Step-by-Step Guide to Your First Mailchimp Campaign

Email marketing is one of the most effective ways to connect with your audience, nurture leads, and drive sales. Mailchimp, a popular email marketing tool, makes it easy to create, send, and track email campaigns.
If you’re new to Mailchimp, this guide will walk you through setting up your first campaign, step by step.
Email Marketing Terms You Need to Know
Campaign
Any distributed content that's created and measured in Mailchimp, including regular emails, text messages, automations, landing pages, and ads.
Audience
A place for you to collect and manage your contacts in Mailchimp.
Contact
Someone whose email or mobile number is stored in your account. A contact’s email marketing status determines what kind of content you can share with them. Statuses include:
- Subscribed – Actively receiving emails.
- Unsubscribed – Opted out of receiving emails.
- Non-Subscribed – Has interacted with your brand but hasn’t opted in.
- Cleaned – Invalid or undeliverable email addresses.
- Archived – No longer counts toward audience limits but can be restored.
Tags
Labels you assign to contacts to organize and categorize them based on interests, behavior, or campaign engagement.
Segments
A filtered group of contacts based on shared characteristics such as location, engagement level, or purchase history.
Groups
A way to categorize contacts based on preferences or interests, allowing subscribers to choose what type of content they receive.
Merge Tags
Dynamic placeholders that personalize emails (e.g., |FNAME| to insert the recipient’s first name).
Template
A pre-designed layout for email campaigns, helping to maintain brand consistency.
Automation
A series of pre-scheduled emails triggered by subscriber actions, such as a welcome email after signing up.
Journey
A visual workflow that automates a subscriber’s experience based on their interactions with your brand.
A/B Testing
A feature that allows you to test different versions of an email to see which performs best in terms of open rates, clicks, or conversions.
Reports
Analytics data provided by Mailchimp to track email performance, including open rates, click-through rates, and engagement.
Click Map
A visual representation showing where recipients clicked within an email.
Deliverability
A measure of how successfully emails reach subscribers' inboxes rather than spam or junk folders.
Email Authentication
Security measures like SPF, DKIM, and DMARC that help verify your emails as legitimate and improve deliverability.
Abandoned Cart Email
An automated email sent to customers who added products to their cart but didn’t complete the purchase.
Send Time Optimization
A Mailchimp feature that analyzes subscriber data to send emails at the most effective time for engagement.
Choose a Campaign Type
Mailchimp offers various types of campaigns to help businesses connect with their audience. Here are the main types of campaigns available:
Email Campaigns (Primary Mode of Communication)
- Regular Email Campaign – One-time email for updates, promotions, or newsletters.
- Automated Email Campaign – Series of triggered emails (e.g., welcome series, follow-ups).
- A/B Testing Campaign – Sends different variations to test performance.
- Plain-Text Email Campaign – Simple, no-design email for direct communication.
- RSS-to-Email Campaign – Automated emails based on blog or content updates.
Social Media Ad Campaigns
Create and manage ads on Facebook, Instagram, and Google directly from Mailchimp.
- Best for: Expanding reach beyond email subscribers.
- Customization: Target specific segments of your audience.
Create a Campaign
In Mailchimp, you have three main options for creating a campaign, each offering different features to suit your needs. Here's a brief overview of each option:
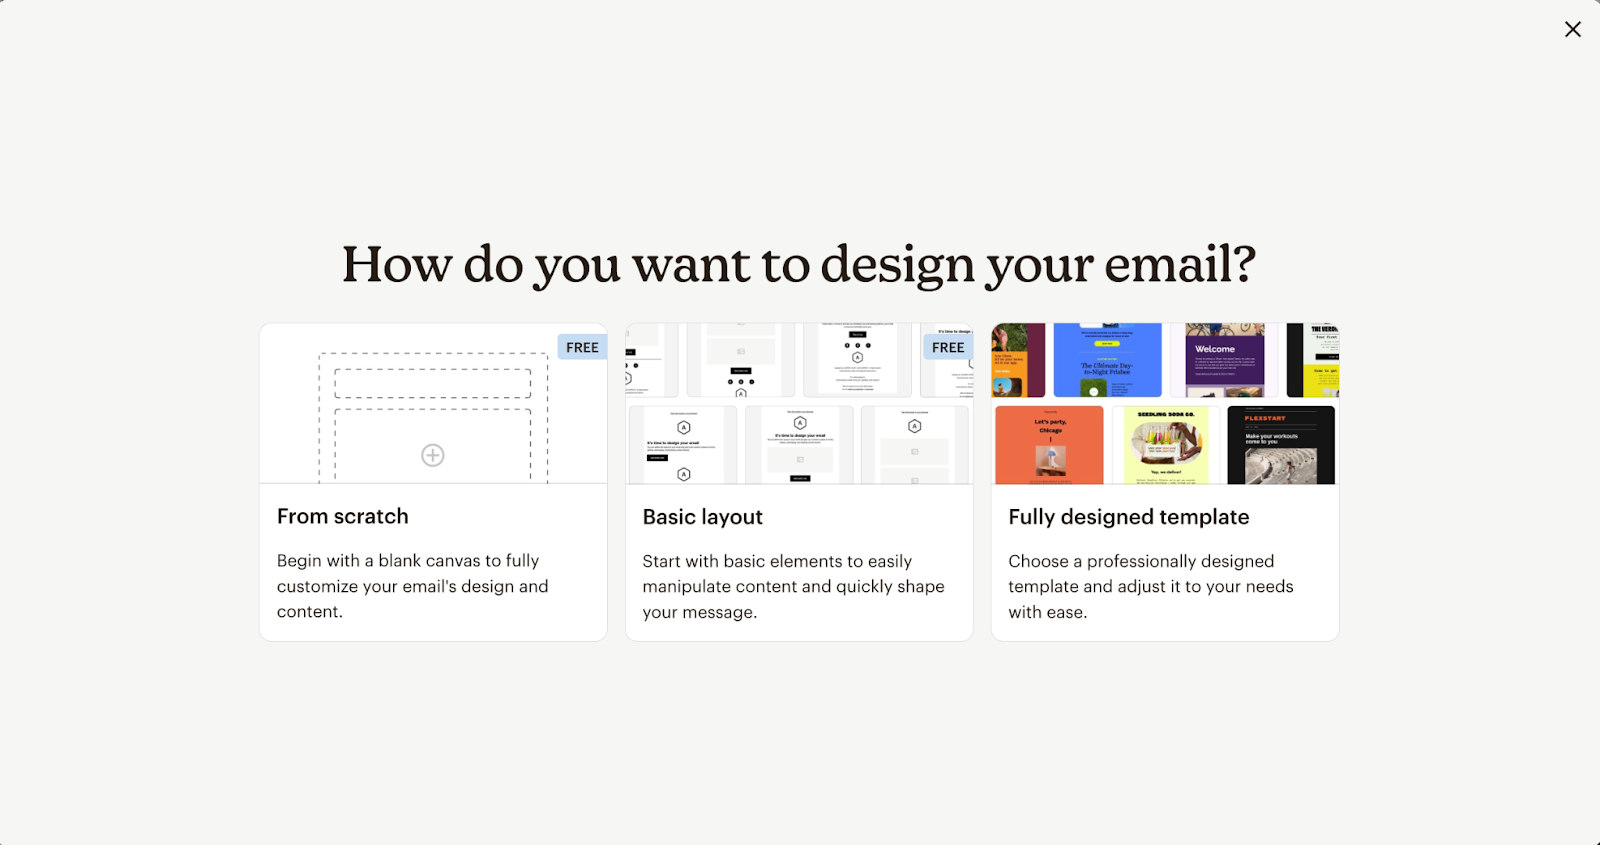
- From Scratch: This option allows you to start with a blank canvas, giving you full control over the design and content of your email. It's ideal for those who want to fully customize the layout and elements without any predefined structure.
- Basic Layout: With this option, you start with basic elements that can easily be manipulated to quickly shape your message. It offers a balance between customization and speed, making it perfect for those who want more structure but still want to make adjustments to the content and layout.
- Fully Designed Template: Here, you can choose a professionally designed template and adjust it to meet your specific needs. This option is great for those who want a polished design without starting from scratch, allowing you to focus on customizing the message rather than the layout.
Each of these options provides different levels of customization, so you can choose based on how much control you want over the email design and how quickly you need to create your campaign.
Guide to Build Your First Campaign
Creating a campaign in Mailchimp is easier than you think! Whether you’re sending a newsletter, a promotional email, or an automated follow-up, Mailchimp’s intuitive platform makes the process smooth. Let’s walk through the steps to create your first email campaign.
1. Getting Started
First things first, log into your Mailchimp account. Once you’re in, head over to the Create button at the top of your dashboard. This is where you’ll find all the different types of campaigns you can create. Since we’re focusing on an email campaign, choose Email and then select Regular Email for a one-time send. If you’re looking for automation, A/B testing, or even social media ads, those options are there too!

Now, give your campaign a name—something descriptive like “February Newsletter” or “Weekend Promo.” Don’t worry; your audience won’t see this name—it’s just for your reference.
2. Selecting Your Audience
Next up is choosing who gets your email. Under the To field, click Add Recipients and select your Audience List. If you have different segments, like customers who haven’t opened recent emails or VIP shoppers, you can send targeted emails by selecting a specific segment. This helps you personalize your content and improve engagement.
3. Setting Up Sender Details
Now, let’s make sure your recipients know the email is from you. In the From section, enter the sender name (like your brand or company name) and the email address that will be used for replies. Keeping this familiar helps build trust and avoids your email getting marked as spam
4. Writing an Attention-Grabbing Subject Line
Your subject line is the first thing people see, so make it count! Under the Subject section, enter something engaging—like “Flash Sale: 20% Off Today Only! 🎉” or “Your Exclusive Invite Inside.” A compelling subject line can make all the difference in boosting your open rates. You can also add preview text (the short text next to the subject in inboxes) to give your audience a little teaser.
5. Designing Your Email
Now for the fun part—designing your email! Click Design Email, and you’ll see Mailchimp’s email builder. You can choose a pre-designed template or start from scratch with a blank layout.
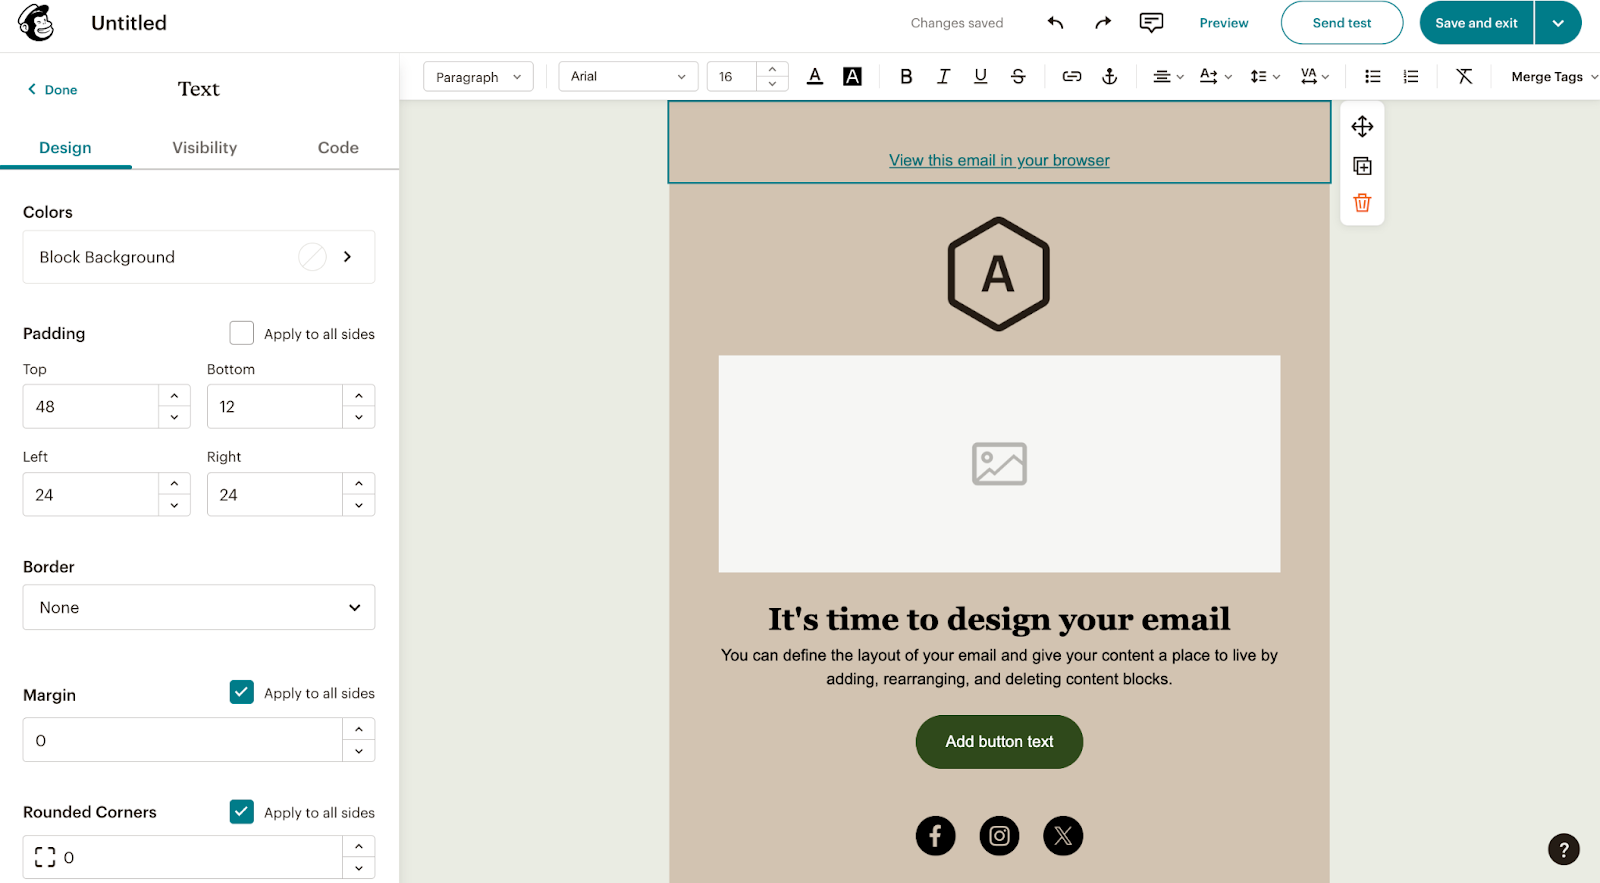
- Add text – Write a friendly, engaging message that suits your campaign.
- Insert images – Upload product photos, banners, or any visuals to make your email stand out.
- Include buttons – A Call-to-Action (CTA) like “Shop Now” or “Get Started” helps direct users to your website.
- Use links – Drive traffic to your latest blog post, product page, or special offer.
Once your email looks perfect, hit Preview & Test to see how it appears on different devices. This is crucial because you want to make sure it looks great on both desktop and mobile.
6. Choosing When to Send
You’re almost there! Click Continue to Review, and Mailchimp will flag any missing details. Now, decide whether to Send Now or Schedule for Later. If you choose to schedule, you can set a specific date and time, and Mailchimp even offers Send Time Optimization to suggest the best time for engagement.
7. Sending Your Campaign & Tracking Results
Once you hit Send, your campaign is live! But the work doesn’t stop there. Head over to the Reports tab to see how your email is performing. Track key metrics like:
- Open Rate – How many people opened your email.
- Click-Through Rate (CTR) – How many clicked on your links.
- Unsubscribes & Bounces – Who left your list or didn’t receive the email.
Analyzing these insights helps you understand what works and what needs improvement for your next campaign.
Automate with viaSocket
With viaSocket , you can automate Mailchimp tasks like adding and updating contacts, triggering campaigns based on user actions, and scheduling emails. You can also automate A/B testing, segment your audience based on behavior, and track campaign performance. Additionally, you can set up automated workflows for e-commerce tasks, such as abandoned cart reminders and post-purchase follow-ups. This streamlines your email marketing process and boosts efficiency.
